OAuth2.0 Auth-Code Flows & RBAC from scratch with NodeJs
The OAuth2.0 framework defines a set of protocols that allow an application to obtain authorization grants for certain resources/actions of a user by delegating authentication and consent to a centralized server.
For example, a web application offering a ‘Sign in with Google’ feature and requesting for permissions to ‘Read GMail Contacts’ and ‘Read Drive Information’.
The centralized interface between the user and the application allows for:
- Better authentication and authorization practices — developers on different projects need not build their own user-store, authentication mechanisms and user roles/permissions.
- Third-party applications need not implement their own identity systems. They can instead rely on other providers that their users trust.
- Centralized systems can ensure that applications access data that the user explicitly consented to and nothing more.
Terminology
- Resource-Owner: the end-user who will consent to permissions and authenticate.
- Client: the application accessed by the Resource-Owner that would like to access a service that the Resource-Owner uses (typically via API).
- Authorization-Server: the centralized server that carries out the actual authentication and scopes the access of the Client to the Resource-Owner’s resources.
- Resource-Server: are application servers that provide API services. This server will issue services based on the access token provided to it by a Client. It fully trusts that access token as it has been issued by the centralized Authorization-Server that this server is also integrated with.
OAuth2.0 provides multiple auth-flows, of which the Authorization Code Flow is primarily used for Resource-Owners communicating with Client web applications and goes as follows:
- Precursor: The Client and the Authorization-Server go through a ‘registration’ process where parameters such as
client_id, client_secret, and redirect_uriamong others are decided. The technical usage of these parameters is explained in the implementation section. - Step 1: The Resource-Owner contacts the Client (a web-app) through a browser, and chooses to grant certain permissions that the application requests.
- Step 2: The Client redirects the Resource-Owner to the Authorization-Server’s
/authendpoint, where the Resource-Owner actually authenticates with credentials and consents to the Client getting stated permissions. - Step 3: The Authorization-Server redirects the Resource-Owner back to the Client with a
code. - Step 4: The Client receives the
code, and once again reaches out directly to the Authorization-Server and exchanges it for an access token through the Authorization-Server’s/tokenendpoint. (This seems redundant, why exchange a code for a token? Explained in the Step 4 implementation)
The Client will now have an access token that has been created by a trusted source — the Authorization-Server, to which the Resource-Owner authenticated to and consented the grant of permissions. This token may now be passed to Resource-Servers that trust the Authorization-Server which can now securely provide services to the Client.
Below is an implementation of the Authorization Code Flow from scratch. Extending this for RBAC is covered after.
Step 1: Client App — Requesting a Code
Setting up code on the ‘Client’ ie. the web application that the Resource-Owner will access. Remember that the registration step has already occurred. The Authorization-Server has the details of the Client application including unique identifiers such as the client_id and client_secret, which Referer it will be sending requests from, and which redirect-uri information is to be sent to as a callback.
const express = require('express');
const bodyparser = require('body-parser');
const path = require('path');
const crypto = require('crypto');
const request = require('request');
const fs = require('fs');
const jwt = require('jsonwebtoken');

// Client Registration Details - has to be set-up with the authorization server prior
const auth_server_authorize_endpoint = 'http://13.127.98.56:9000/auth';
const auth_server_token_endpoint = 'http://13.127.98.56:9000/token';
const client_id = 'client_1';
const redirect_uri = 'http://13.127.98.56:8443/oauth_callback';
// keep this a secret, should be stored securely rather than in source
const client_secret = 'this_is_client_1_secret';

// used later to comply with spec - RFC-6749 - maintaining a state param to avoid CSRF and time flows
var state_cache = [];

var app = express();
app.use(bodyparser.urlencoded({extended: true}));

// send down index.html - contains radio buttons for what scope/perms to request and a submit button
app.get('/', (req, res)=> {
        res.sendFile(path.join(__dirname, 'static', 'index.html'));
});

app.listen(8443, () => {
        console.log('client listening on 8443. You as a resource owner visit this');
});
<html>
<body>
<form action="/authme" method="POST">
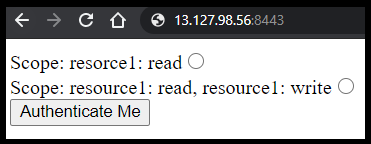
Scope: resorce1: read<input type="radio" name="selected_scope" value="resource1_read">
<br>
Scope: resource1: read, resource1: write<input type="radio" name="selected_scope" value="resource1_read resource1_write">
<button type="submit" value="Authenticate Me">Authenticate Me</button>
</form>
</body>
</html>The page served by the Client web application is as follows:
When the user (Resource-Owner) picks an option and submits, a POST route services the request. The Client redirects the Resource-Owner to the Authorization-Server’s /auth endpoint with pre-defined parameters such as the client_id and response_type as well as the selected scope and generated state.
app.post('/authme', (req, res) => {
        var state = crypto.randomBytes(10).toString('hex');
        params = `?response_type=code&client_id=${client_id}&scope=${req.body.selected_scope}&state=${state}&redirect_uri=${redirect_uri}`;
        state_cache.push(state);
        res.redirect( auth_server_authorize_endpoint + params  );
});
Boilerplate code for the Authorization-Server:
const express = require('express');
const bodyparser = require('body-parser');
const path = require('path');
const crypto = require('crypto');
const jwt = require('jsonwebtoken');
const fs = require('fs');

// for each client, we need to store the origin, client_id, client_secret, client_type
const registered_clients = {
        client_1 : {
                referer: 'http://13.127.98.56:8443/',
                client_type: 'confidential',
                client_secret: 'this_is_client_1_secret',
                redirect_uri: 'http://13.127.98.56:8443/oauth_callback'
        }
}

const code_token_cache = {};


var app = express();
app.use(bodyparser.urlencoded({extended: true}));
app.set('view engine', 'ejs');


app.listen(9000, () => {
        console.log('auth server listening on 9000');
});
The Client redirects the Resource-Owner to the Authorization-Server’s /auth endpoint with pre-defined parameters such as the client_id and response_type as well as the selected scope and generated state. The state parameter is of additional importance as it enables the Client and Authorization-Server to synchronize throughout the flow and also prevents CSRF/replay attacks by a bad-guy trying to get access tokens. (See CSRF in references)
Step 2: Authorization-Server — Authenticating the Resource-Owner and Sending back a Code to the Client
The registration process has been completed prior and is stored here in the form of a JSON in the source. Details such as the issued client_id, client_secret, referer — the address that will make requests and redirect_uri — the address to callback to are recorded.
Implementing the /auth Endpoint and validating the Client:
As seen earlier, the Resource-Owner submitting the form on the Client’s page will trigger a redirect to this server’s /auth endpoint with certain parameters about the Client itself. This implementation has a separate function to match the parameters in the request to the parameters recorded during registration.
// given a set of client details that have hit the /auth endpoint,
// check if they are valid and if a code should be issued
// this implementation checks for existance of client_id, referer, redirect_uri,
// requires response_type == 'code', requries state parameter
const validate_client = (client_details) => {
        var known_client = registered_clients[client_details.client_id];
        if(known_client == null)
                return false;

        if (client_details.referer == known_client.referer) {
                if (client_details.redirect_uri == known_client.redirect_uri) {
                        if (client_details.state && client_details.response_type == 'code') {
                                return true;
                        }
                }
        }

};

// endpoint that the client will redirect the resource owner to
// when the resource owner picks a scope and hits 'Authenticate Me' from the client page
app.get('/auth',  (req, res) => {
        // put all request details into one structure
        var client_details = req.query;
        client_details.referer = req.headers.referer;

        // validate the structure - if the client requesting for auth is integrated with this auth server
        // if allowed, perform the actual authentication with the resource-owner based on said client
        if(validate_client(client_details)) {
                res.render('authpage', {
                                client_uri: client_details.referer,
                                selected_scope: client_details.scope,
                                client_redirect_uri: client_details.redirect_uri,
                                state: client_details.state
                        });
                }

        else {
                res.send('WRONG CLIENT');
        }
});
Performing Resource-Owner authentication after Client validation:
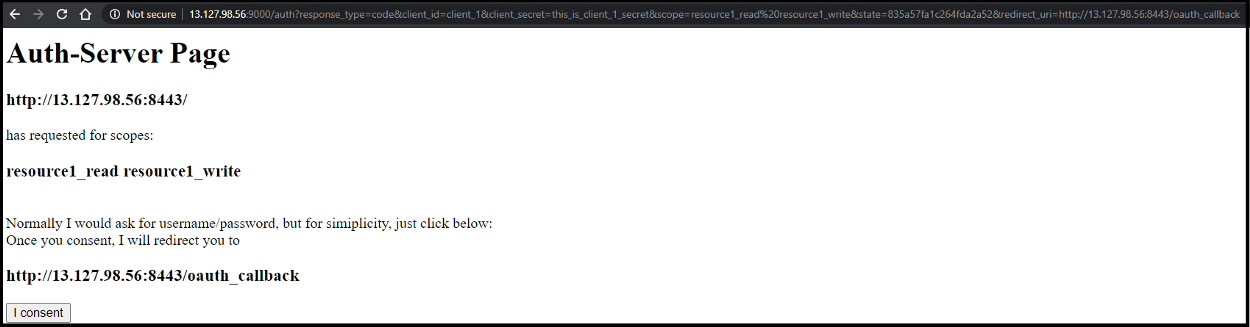
Once the Client’s request parameters have been verified, the Authorization-Server needs to authenticate the Resource-Owner. This may be done through a traditional email-password entry or through other factors and creation of a session with user details. For simplicity, this implementation assumes a single generic user and uses a button to simulate successful authentication.
<html>
        <body>
                <h1> Auth-Server Page</h1>
                <h3><%= client_uri =%></h3> has requested for scopes: <h3><%= selected_scope =%></h3>
                <br>
                Normally I would ask for username/password, but for simiplicity, just click below:
                <br>
                Once you consent, I will redirect you to <h3><%= client_redirect_uri =%></h3>
                <form action="/consent" method=POST>
                        <input type="hidden" name="selected_scope" value="<%= selected_scope %>"/>
                        <input type="hidden" name="state" value="<%= state %>"/>
                        <input type="hidden" name="redirect_uri" value="<%= client_redirect_uri %>"/>
                        <button type="submit">I consent</button>
                </form>
        </body>
</html>
The authentication page that the Authorization-Server presents after validating the incoming Client request:
The route handling the consent functionality is implemented as follows:
// perform user authentication here, store a session - req.session.username
app.post('/consent', (req, res) => {
        // this token below later is treated as the payload of a JWT
        var token = {authorized: true, username: 'username_here_from_auth_server_session', scope: req.body.selected_scope};
        var code = crypto.randomBytes(5).toString('hex');

        // typically, also add functionality to time the validity of this token
        // code-token mapping is implemented to prevent CSRF as well as time-out auth flows if they take too long
        // to prevent vectors such as replay attacks
        code_token_cache[code] = token;

        // redirect back to the client's registered redirect_uri with the state that they sent over
        // and with the auth code that they will come back with to exchange for the actual token later
        res.redirect(req.body.redirect_uri + `?state=${req.body.state}&code=${code}`);
});
Does this look familiar?
This is essentially what you see when you sign in with Google or install new applications that ask for permissions, eg. ‘this app would like access to make phone calls, read contacts, read messages’, etc. Each of these ‘permissions’ would be formally defined by Resource-Servers , integrated with the Authorization-Server and requested by the Client, typically with a naming convention such as ‘phone:write contacts:read messages:read’.
Once the user agrees to the scope requested by the Client by authenticating, this Authorization-Server will redirect back to the Client’s pre-registered redirect_uri with a one-time code and the state that it was sent originally.
It also maintains the code and its relevant token in a cache to ensure that it can only be exchanged once within a limited time period.
This implementation keeps it simple and maps a code to a token containing fields such as authorized, username, and scope. You may choose to issue additional information such as an intended audience, issuer details, timestamps, etc.
Step 3: Client App — Exchanging the Code for a Token
The Client listens on a pre-registered callback endpoint for a code. This code is validated by ensuring that it is tied to a state, ie. it was expected and not unsolicited. The Client will now POST to the Authorization-Server’s /token endpoint with the code and its client_secret. The client_secret is sent to authenticate the Client and to ensure that a man-in-the-middle cannot exchange codes for tokens and get unauthorized access. The token that is sent back is a signed JWT (JSON Web Token). The hash of its payload is verified with the Authorization-Server’s public key and can then be used to access services on Resource-Servers . (See references for JWT format and verification).
Client routes for receving the token and sending it to the Authorization-Server for a code:
// this endpoint recieves a code and a state
// checks if state matches the state_cache ie. has a request gone out and is a code awaited?
// if so, get the code from the query_string, exchange that once again with the auth server for an actual token
// why is this done? - Code for Token exchange is done on a secure back-channel
app.get('/oauth_callback', (req, res) => {
        // make sure that a request has gone out, and that we are actually awaiting a code
        // and unsolicited responses are not being serviced
        if (!state_cache.includes(req.query.state)) {
                res.send('State has changed, either the flow took too long or CSRF');
        }
        else {
                // send a POST request to the authorization server over a secure channel
                // to the endpoint that takes codes and gives back access tokens
                token_request_form = {
                        grant_type: 'authorization_code',
                        code: req.query.code,
                        redirect_uri: redirect_uri,
                        client_id: client_id,
                        client_secret: client_secret
                }

                // send the request, if successful, we take the access token out of the body
                // and remove the state from the cache, ie. the flow is complete
                // this token can then be used to access the resources it was scoped to that the client consented to
                request.post({url: auth_server_token_endpoint, form: token_request_form}, (err, httpResponse, httprespbody) => {
                        var auth_server_pub_key = fs.readFileSync('auth_server_pub.pem');
                        var decoded_token = jwt.verify(httprespbody, auth_server_pub_key, (err, decoded) => {
                                if (err) {
                                        res.send(err);
                                }
                                else {
                                        res.send(decoded);
                                        state_cache = state_cache.filter(item => item !== req.body.code)
                                }
                        });
                });
        }
});
But all of this seems redundant, right?
Why do we go through all the redirection to get a code, only to send the code back immediately for a token?
This is done because the code was obtained through redirecting and interacting with the Resource-Owner’s user-agent, typically a user’s browser. Even though we whitelist parameters such as client_id, client_secret, redirect_uri, and others, we ultimately should not trust what the end-user gives us. This code is exchanged over a secure channel between the Client and the Authorization-Server directly that does not have any interaction with the public users or their browsers. There are, however, some cases where this may be desired. Certain flows such as the ‘Implicit Flow’ correspond to this and are usually implemented with Single-Page-Applications — client-side only processing, see references.
Step 4: Authorization Server — Sending back a Token for a Code
The Client, having received a code, will exchange it for an access token after authenticating itself to the Authorization-Server through a pre-defined client_secret. This implementation does not cover timeouts, but codes are usually valid for a very short period of time to prevent replay attacks.
The Authorization-Server then places the token corresponding to that code in the payload of a JWT, signs a hash of the token with its private key for proof of integrity and sends it back.
Routes on the Authorization-Server handling the code-for-token exchange:
// client applications would POST here
// with a code that this server sent out earlier after resource-owner authentication
app.post('/token', (req, res) => {
        // make sure that the code is still alive and can be exchanged
        if (code_token_cache[req.body.code]) {
                console.log('sending back token for code', code_token_cache[req.body.code]);

                // perform client app authentication here, they need to send over the 'client_secret'
                if (registered_clients[req.body.client_id].client_secret != req.body.client_secret) {
                        res.send('Client failed authentication');
                }

                // once client has been authenticated, sign a JWT containing the access token
                // with auth_server's private key. the public key is held by the client and can be used
                // to check integrity
                // also remove this code from auth_server cache so that replay attacks are not prevented
                // ie. one code can be exchanged for one token per resource-owner authentication
                else {
                        var priv_key = fs.readFileSync('auth_server_priv.pem');
                        var signed_token = jwt.sign(code_token_cache[req.body.code], priv_key, { algorithm: 'RS256'});
                        console.log(signed_token);
                        res.send(signed_token);
                        delete code_token_cache[req.body.code];
                }
        }
});
The Result
Now that all 4 steps have been completed, here is what the Client sees:

A token within a signed JWT from the trusted Authorization-Server that it registered with. This token is proof that the Resource-Owner did, in fact, authenticate successfully with the Authorization-Server and consented to the Client getting the ‘resource1_read resource1_write’ permissions. The Client app may then use this token with other API services that require those permissions.
This flow has enabled a third party Client to gain the permissions it needs through delegating authentication and user consent to authorization to a centralized server that both the third-party Client AND the user trust.
This works great when a third-party application requires permissions to access user resources from one or more services. Can we extend this framework for RBAC in our own trusted applications?
Extending OAuth2.0 for Role Based Access Control
You might have multiple internal applications developed by different teams. Having each team maintain their own user-base, permission system and authentication procedure is not only inefficient but is usually insecure.
We can extend the OAuth Auth Code Flow for RBAC by implementing a new scope on the Authorization-Server that returns all the roles and attributes for the Resource-Owner.
This requires changes to Step 2: Authorization-Server — Authenticating the Resource-Owner and Sending back a Code to the Client.
When the Client requests for a ‘getallrolesandperms’ scope, carry out the same Resource-Owner authentication and consent process but generate a token that contains all the applications and roles that the Resource-Owner has access to.
app.post('/consent', (req, res) => {
        var token = null;

        // implement a new scope here
        // that when requested, sends back all details about the user
        // eg. the roles that the user has across applications and any custom attributes
        // this may be used across internal applications and services and even for SSO

        if (req.body.selected_scope == 'getallrolesandperms') {
                token = {
                        authorized: true,
                        username: 'username_from_auth_server_session', // req.session.username
                        scope: req.body.selected_scope,
                        roles: {
                                app1: 'admin',
                                app2: 'admin user',
                                app3: 'user'
                        },
                        special_attributes: {
                                dog_person: true,
                                cat_person: false
                        }
                }
        }
        else {
                token = {authorized: true, username: 'username_here_from_auth_server_session', scope: req.body.selected_scope};
        }
        var code = crypto.randomBytes(5).toString('hex');
        code_token_cache[code] = token;
        res.redirect(req.body.redirect_uri + `?state=${req.body.state}&code=${code}`);
});
Minor change to the client’s front-end page to allow a user to pick this scope:
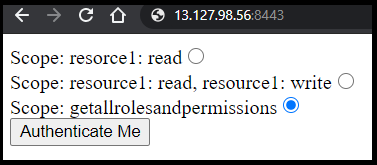
The Results — Extending OAuth2.0 for RBAC

The Client gets back a token within a signed JWT containing user attributes. This can then be used to implement RBAC within the application and user-specific content tailoring. You may also be interested in OpenID Connect (see references) — an additional Identity Layer on top of OAuth2.0 through defining a new scope.
OAuth2.0 can not only be used for delegating consent and authentication to a trusted party , but also for centralizing RBAC for internal highly trusted applications.